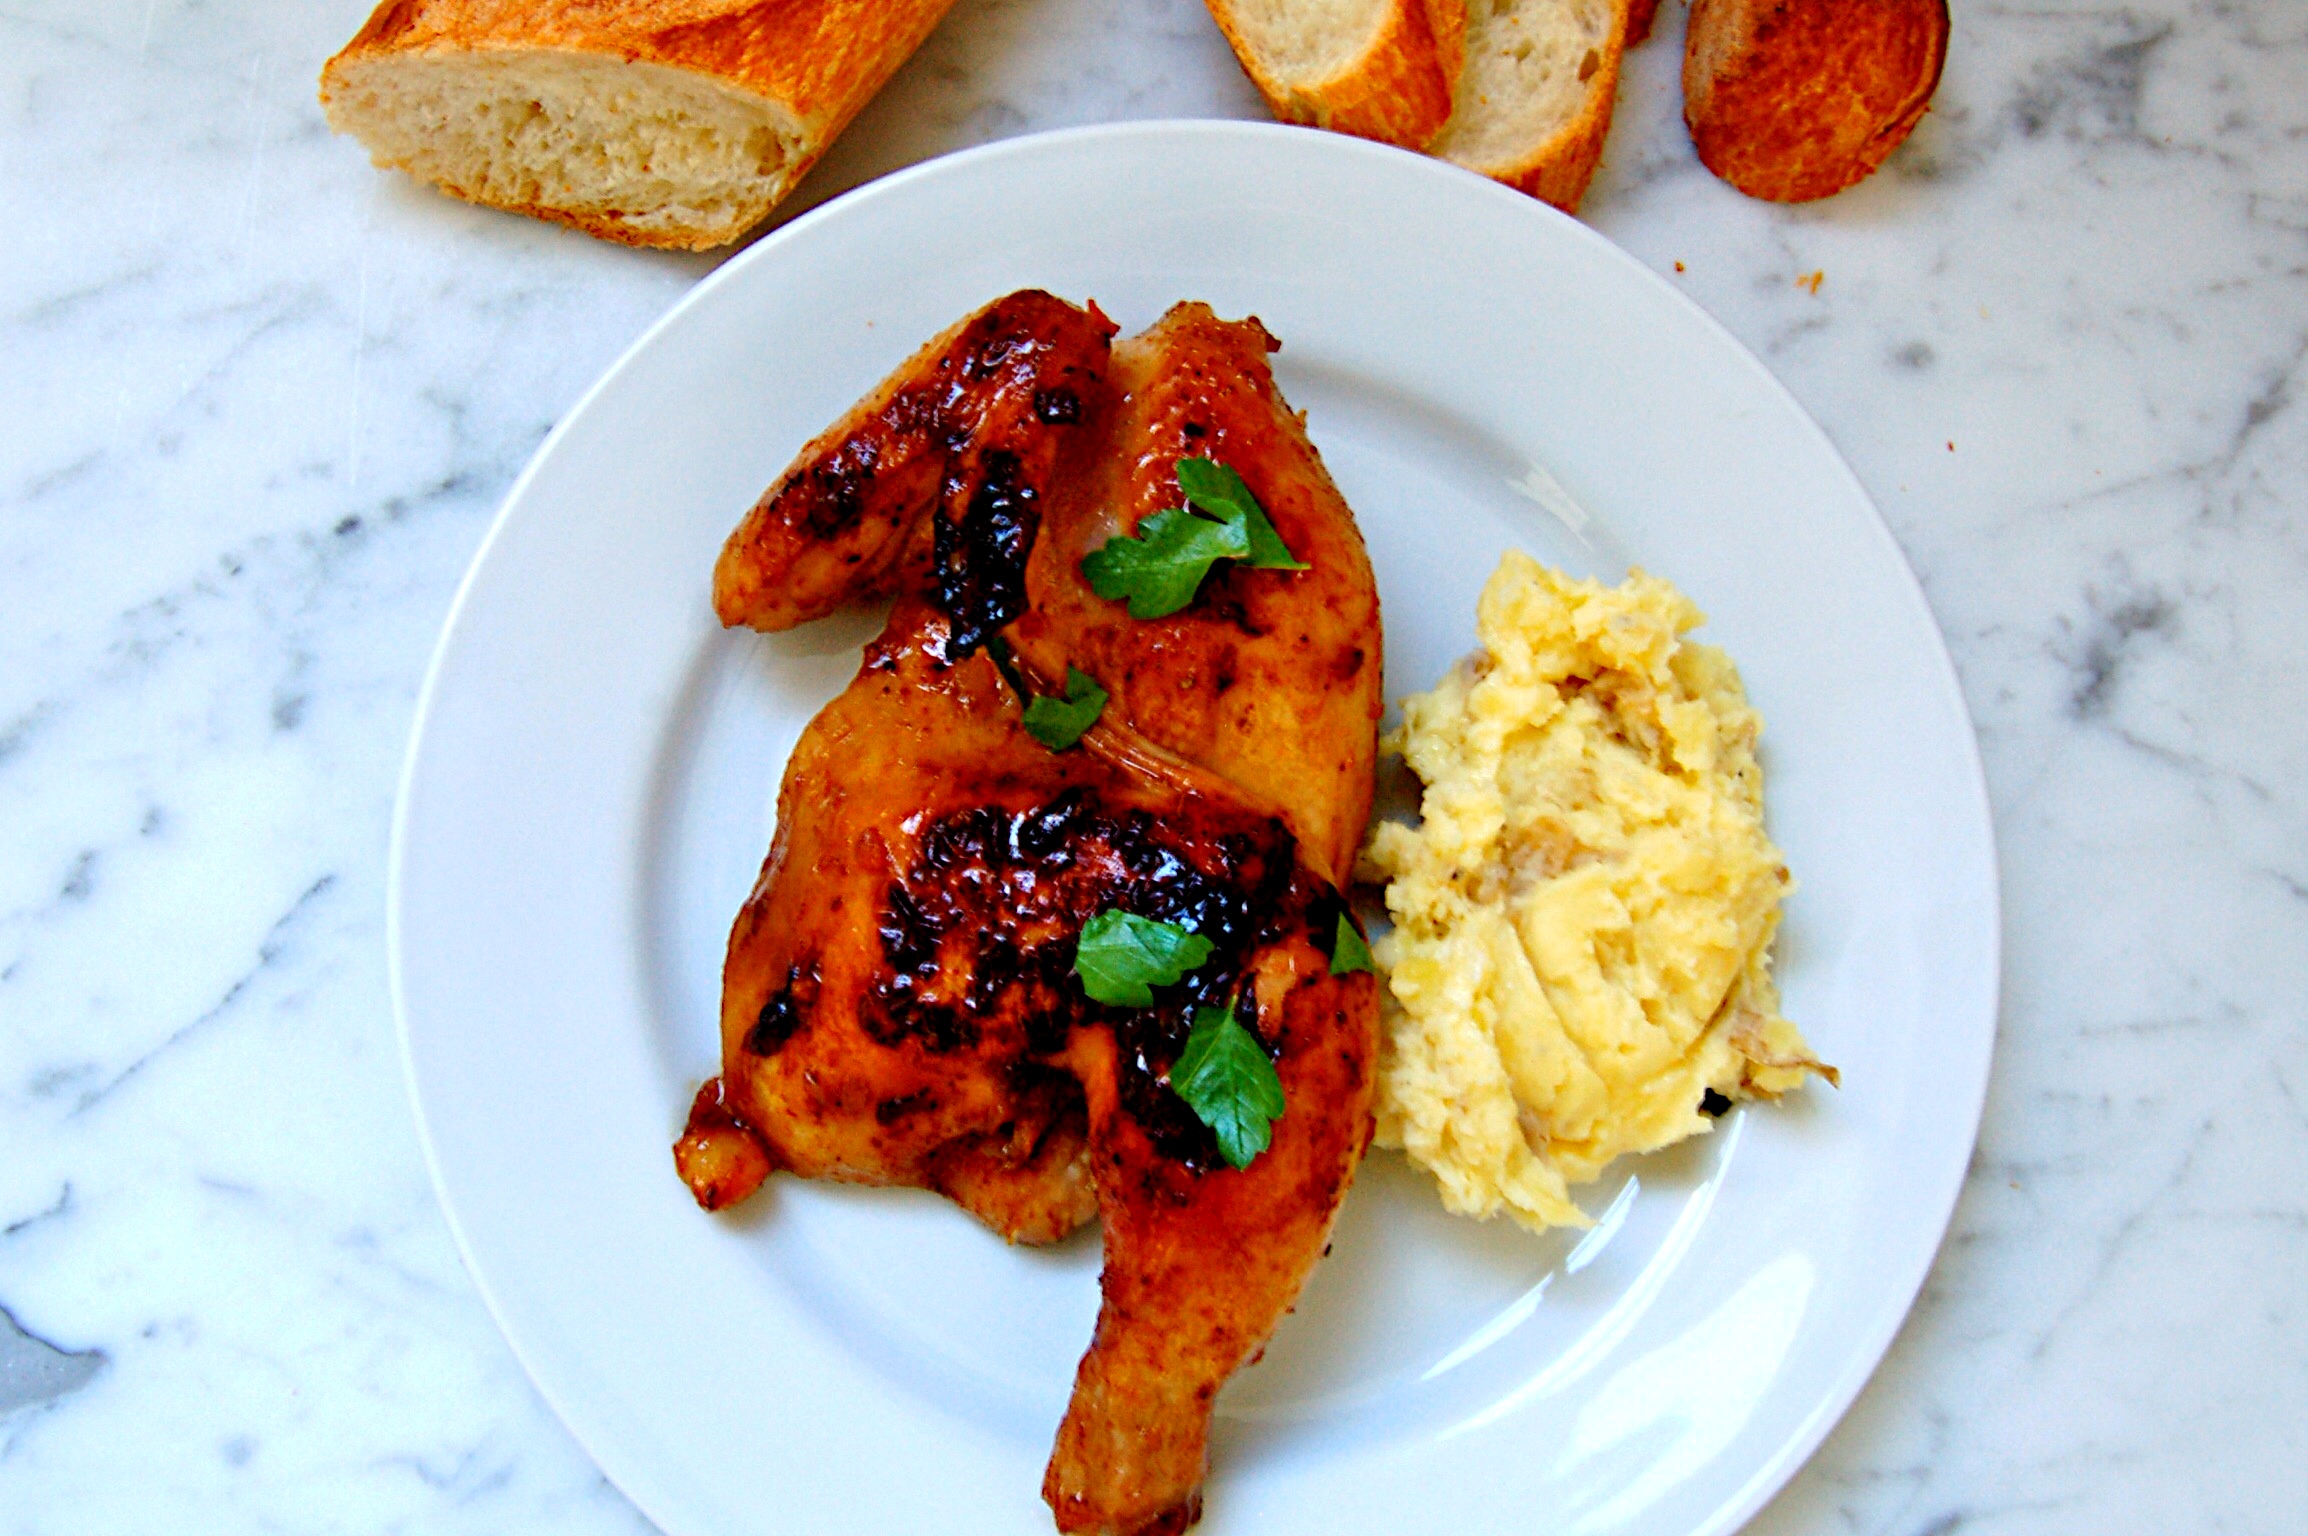
Cornish Hens glazed with Orange Marmalade and Blue Moon
Blue Moon & Orange Glazed Cornish Hens
Note: this recipe requires at least 8 hours to marinate, so plan ahead!
I love drinking a Blue Moon Belgian White beer with an orange slice. And, apparently, so do Cornish hens. Today we’re going to marinate these, as my dad would say, “tasty little buggers” in an orange marmalade and Blue Moon sauce, then glaze the hens while they sear and roast. The marinade adds a savory-sweet flavor to the hens and it turns into magical gravy in your pan, so make sure to have mashed potatoes, bread, napkins, and another Blue Moon on hand. Side note to my mother: yes, I did lick my fingers after I ate this and no I didn’t look like a cat when I did it. Because cats can’t drink beer.
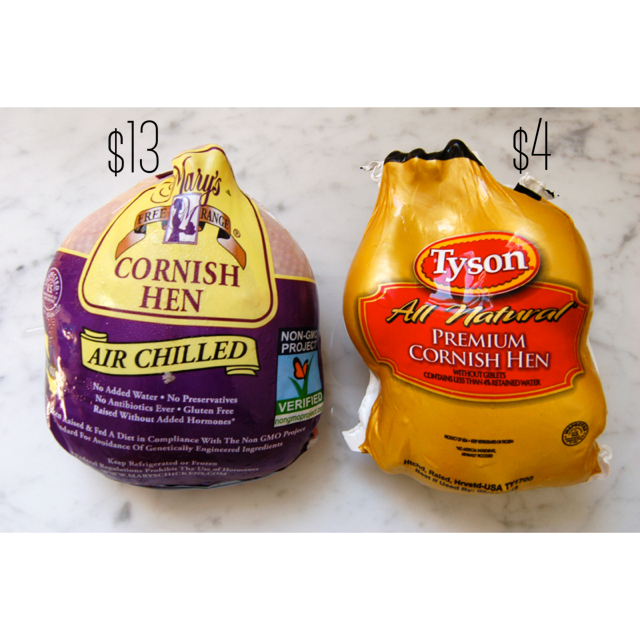
So onto Cornish hens. What are Cornish hens? I’m so glad you asked. It’s a hybrid chicken that’s smaller than your regular meat aisle chicken coming in at about 2lbs each. They are easy to break down and serve about two people each. You can purchase them at your local Safeway in the freezer section or at your local butcher. I took on this self-imposed experiment of marinating and glazing Cornish hens partially because I was inspired by the flavors of an orange slice in my Blue Moon and partially because I wanted to compare two Cornish hens: frozen, non organic “bad guys” vs. free range, cold packed “good guys.” Spoiler alert, the “bad guys” win this time. I’ll walk you through my organic to non-organic compare while I do my little step-by-step recipe slash photo bomb. Ready? Ok lets go…

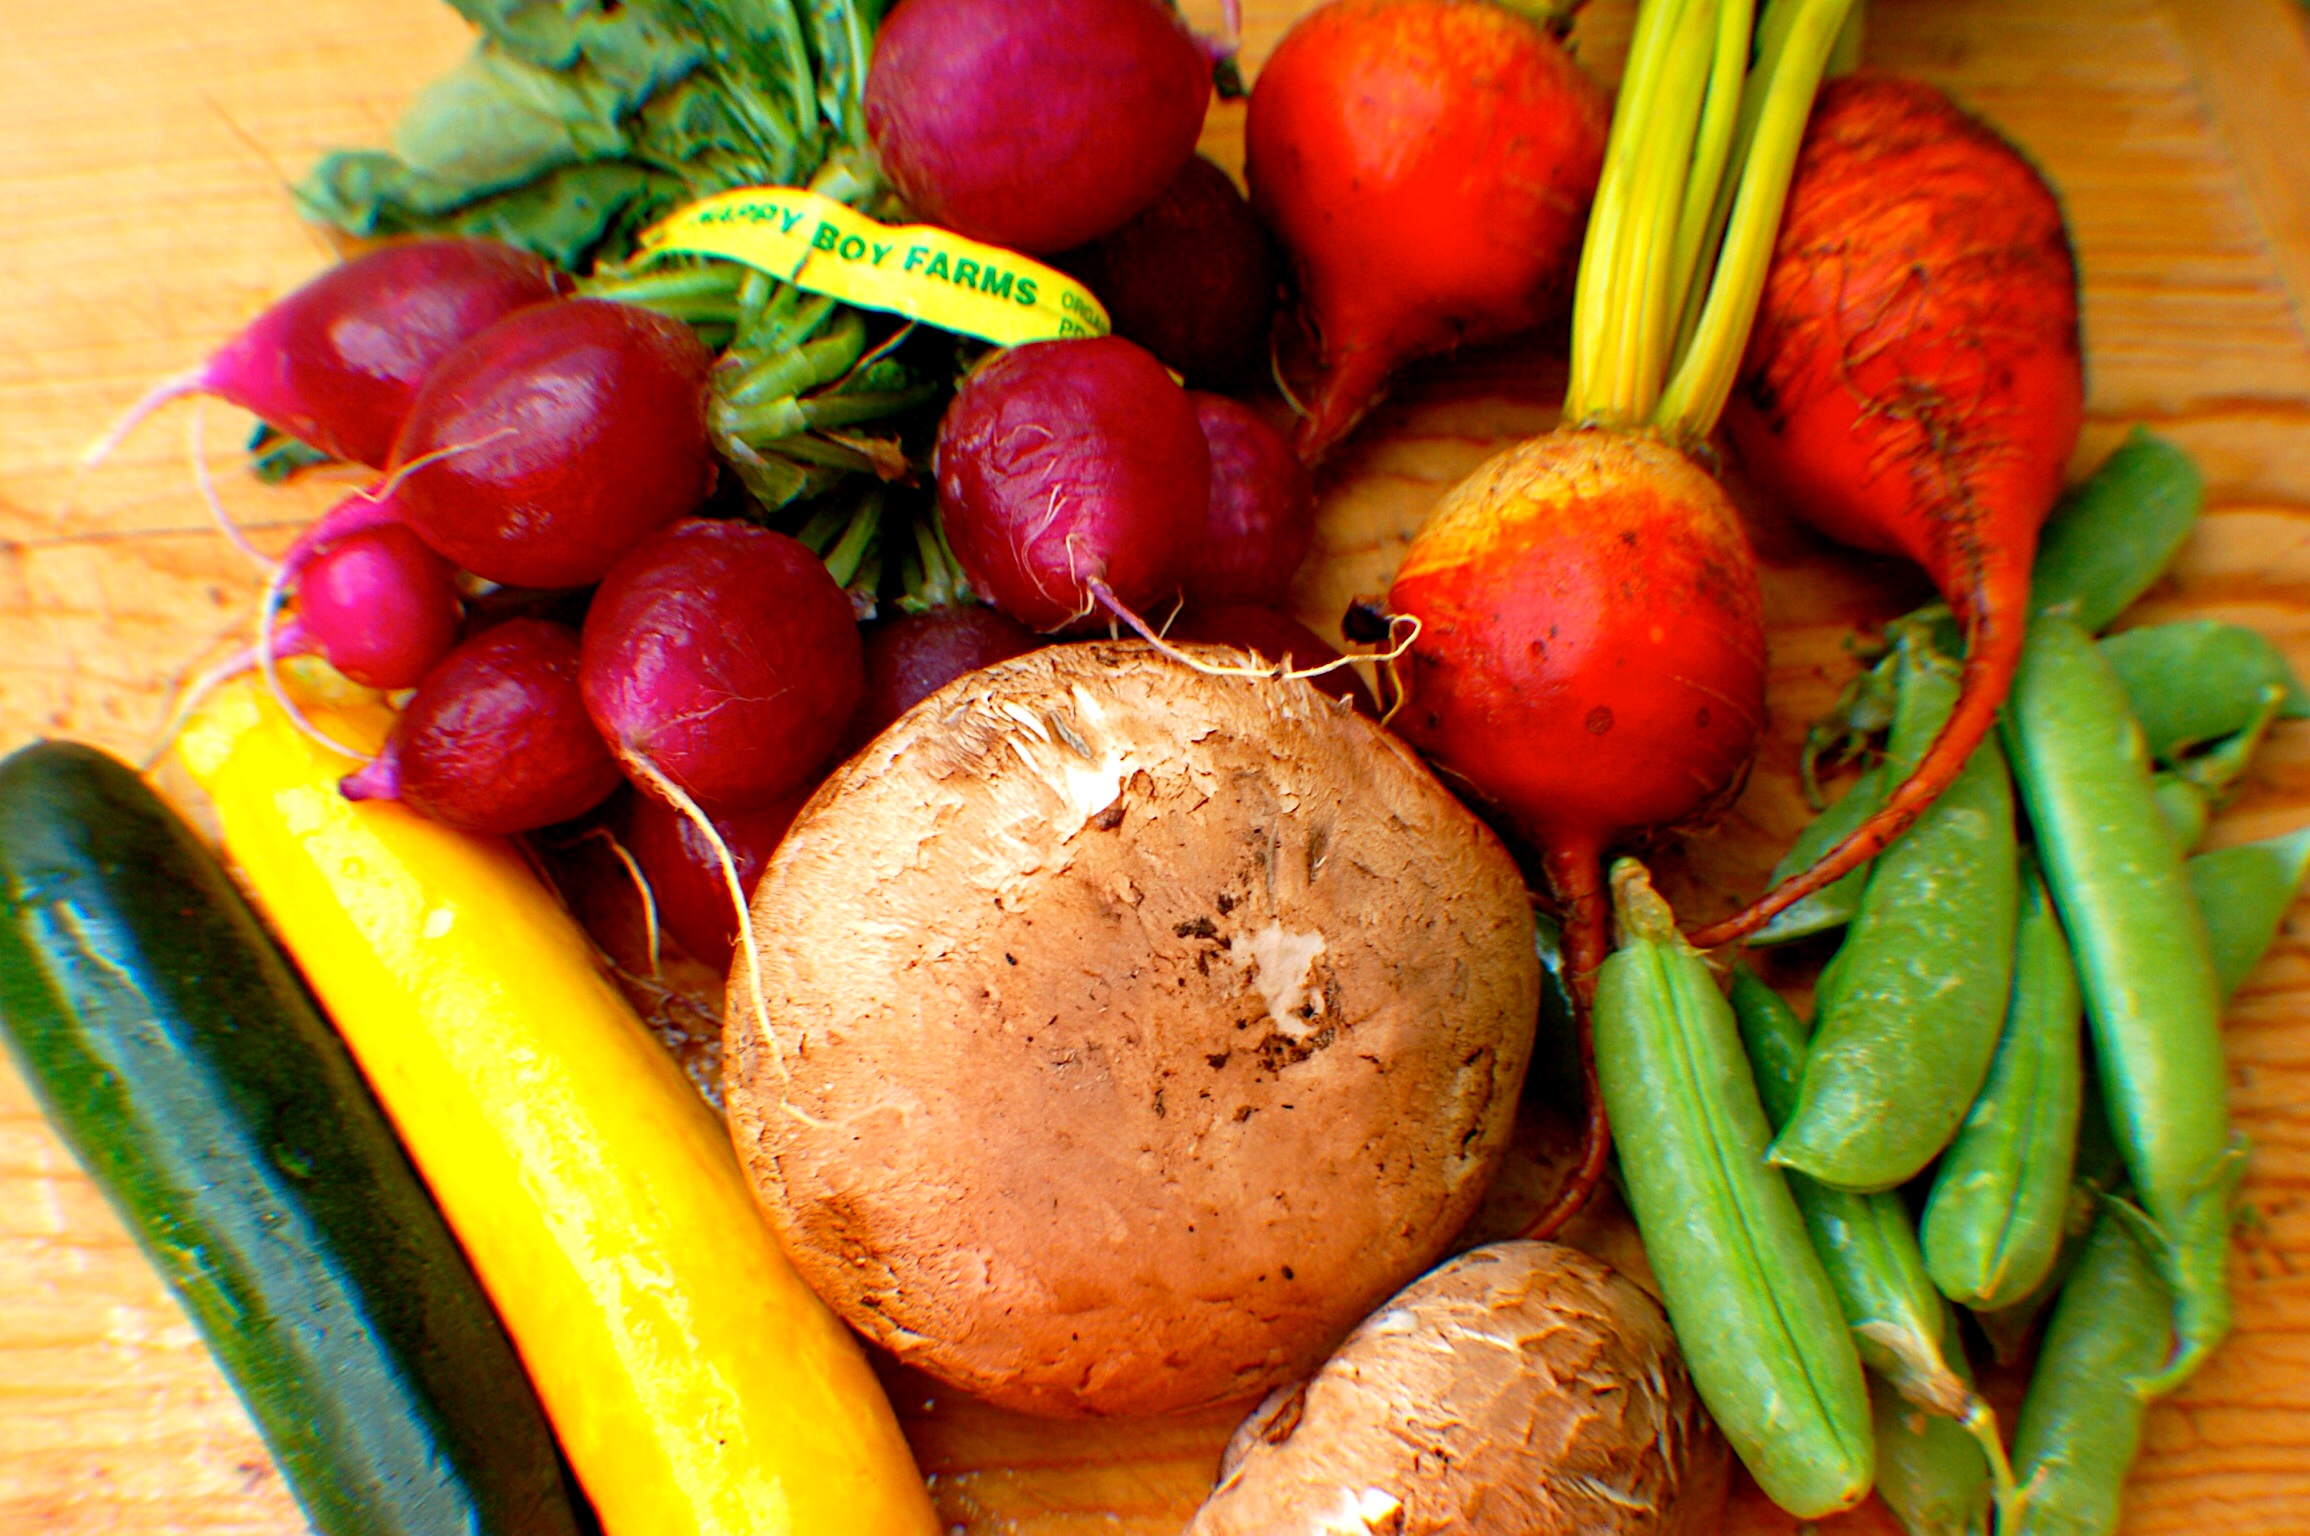
Photo bomb commences! Get together just a few simple ingredients…this recipe is relatively simple
Cornish Hen Ingredients
4 Cornish hens, whole
S&P
1 tbs butter (for searing)
1 tbs olive oil (for searing)
1 sprig flat parsley (for finishing)
(note, ingredients for the marinade are below)
First, let’s prep the Cornish hens and I’ll talk about why the “bad guys” win. It’s simply economics. The organic hens were about 3x the price of the previously frozen and, honestly, once I was done marinating, glazing and roasting, I couldn’t tell the difference. I buy cornish hens because it’s a very affordable way to feed a larger group of people, so the price overrides the benefits of organic here. Just note that the non-organic chickens usually come frozen so there is some thawing time. I did feel great about buying organic, no preservatives, air chilled, no antibiotics or hormones (I have enough of these myself, thank you) and buying local. But if the aforementioned points don’t convince you, then let me show you a photo and a complicated graph of why the non-organic, frozen, Safeway hens won. Simply put, more money left over for beer.
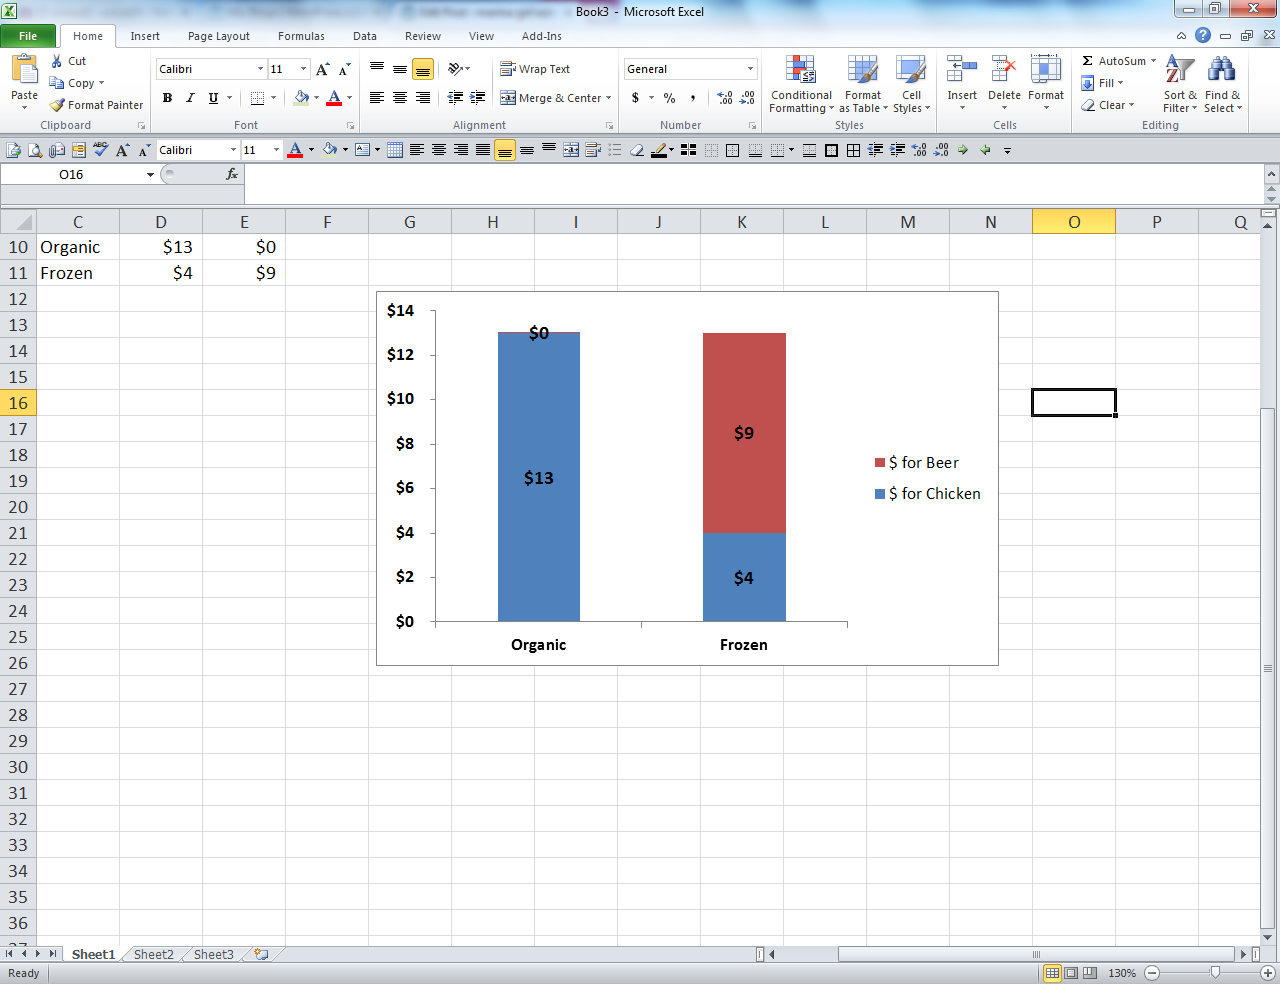
I am so good at my finance job.
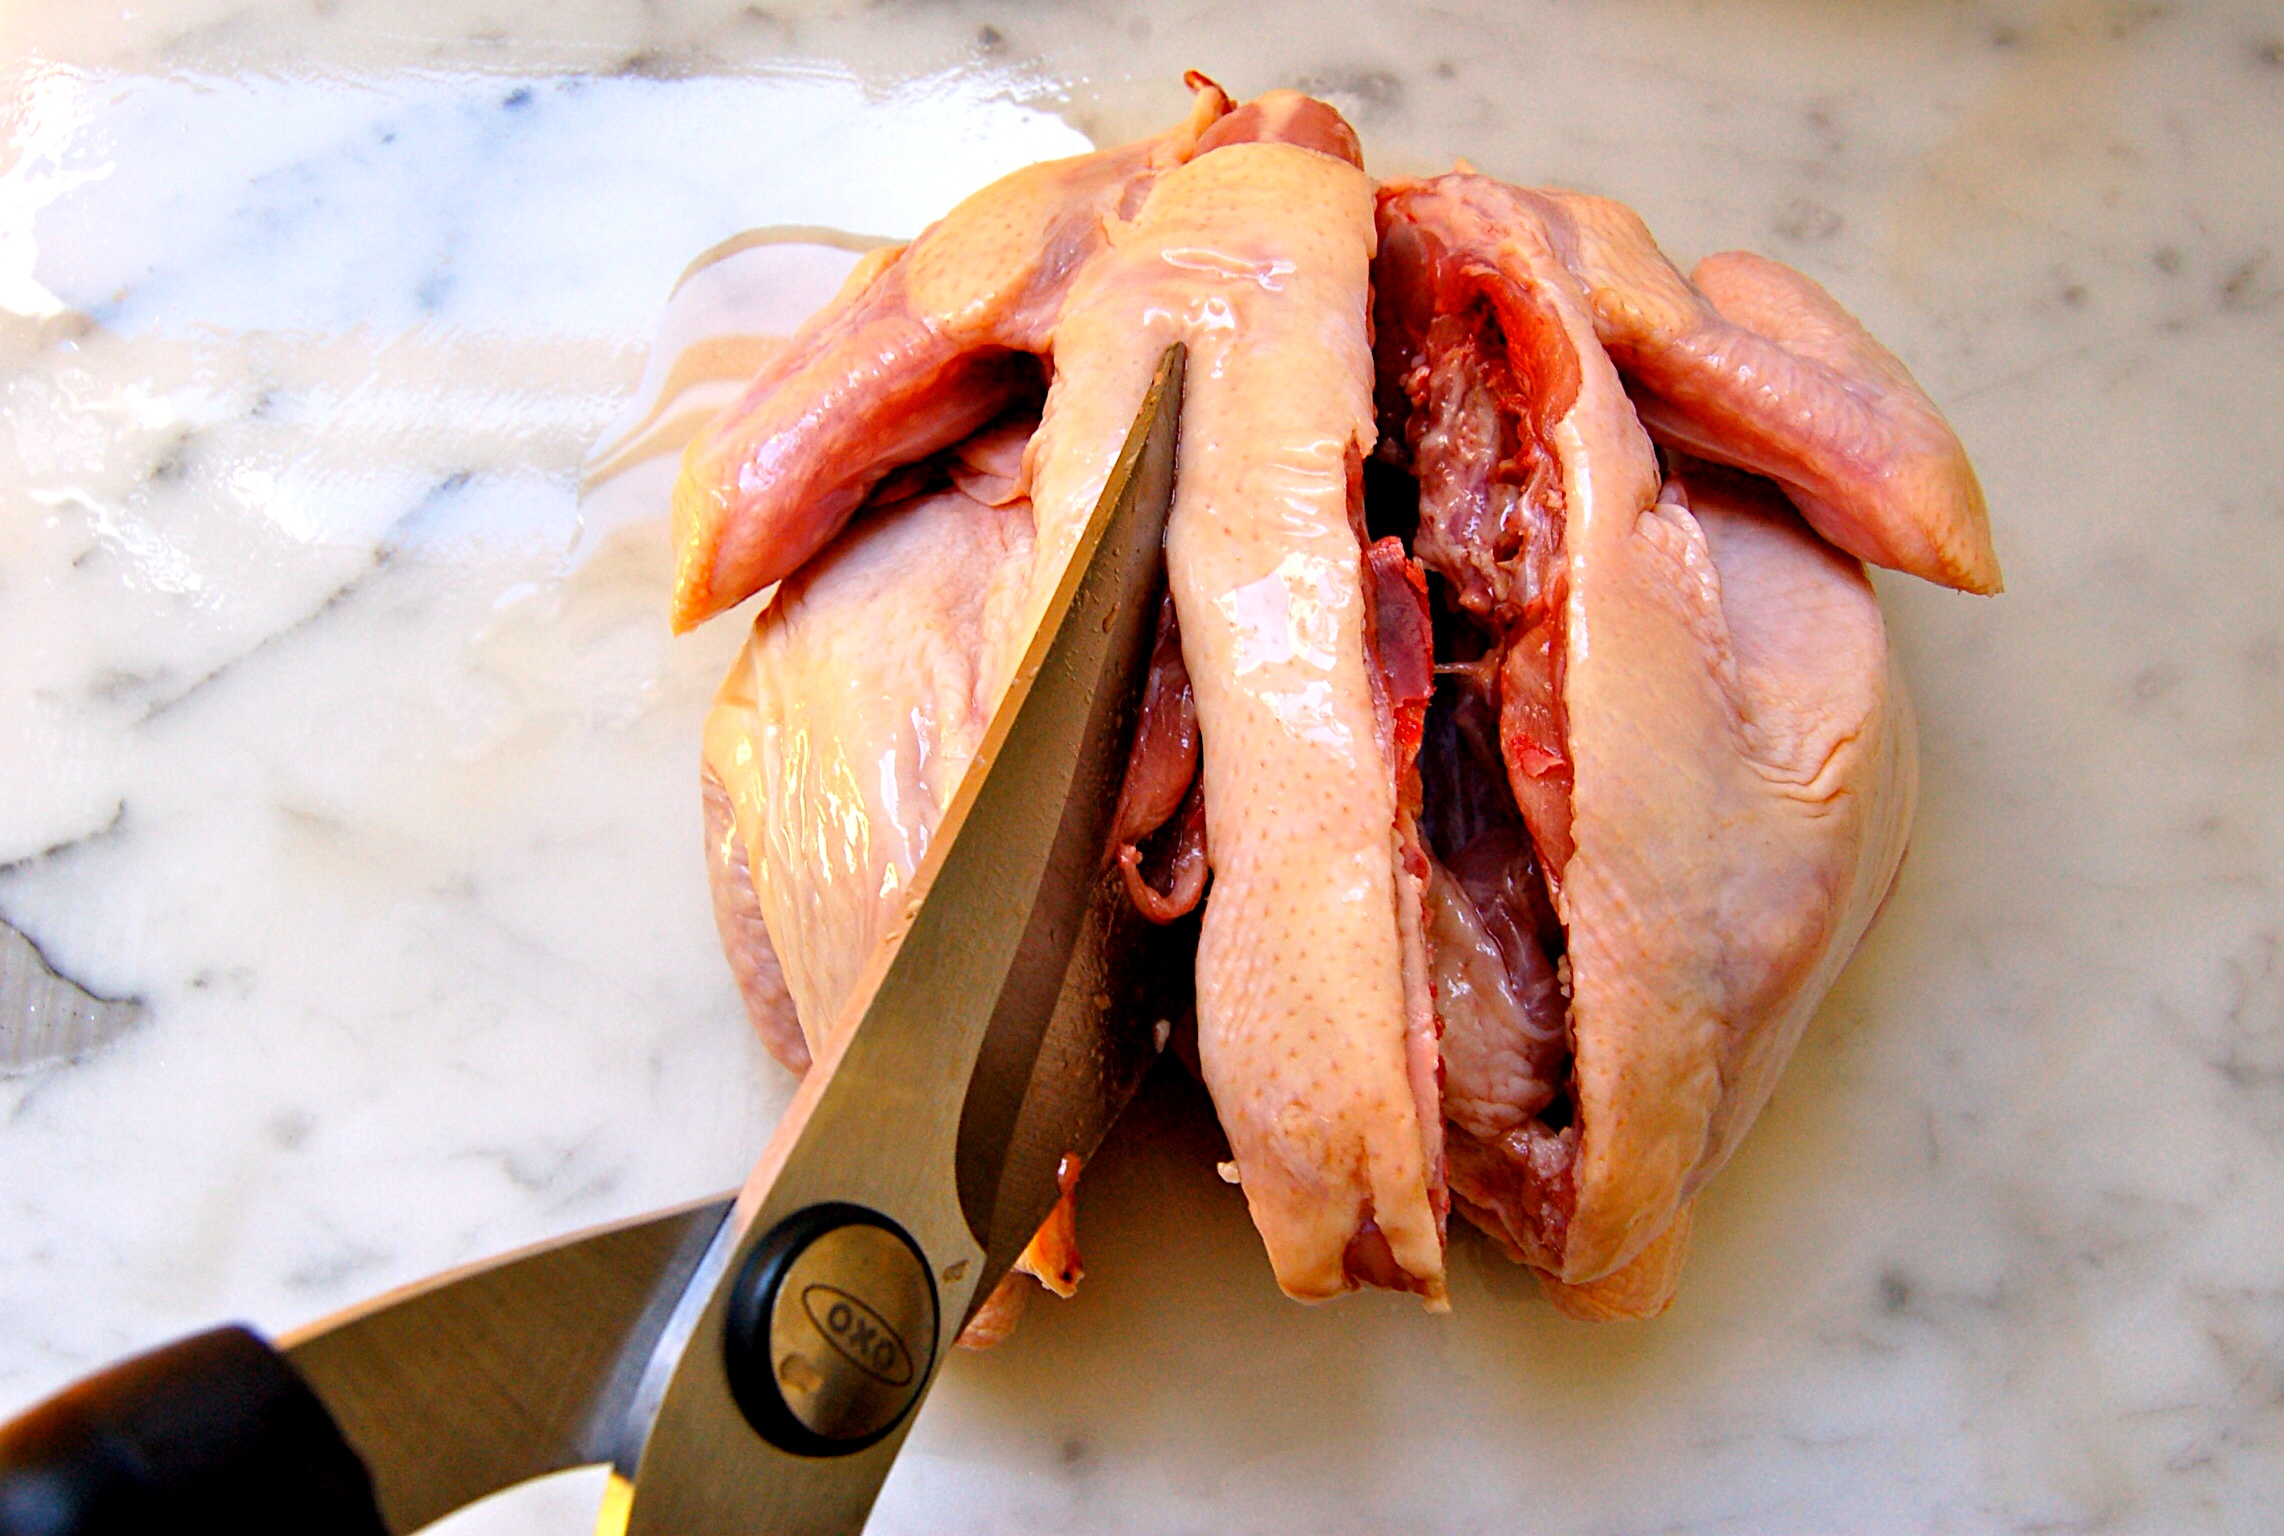
Now that we’re done with the finance portion of this lesson, let’s move on to prepping the hen. Wash and pat dry the hens & place on a cutting board breast down (photo 1 below is breast up. Do that but pretend it’s opposite day). Using poultry shears, cut out the backbone of the chicken (see photos 2 & 3, below). Flip over chicken and, using a large knife, gently slice down the breast to the breast bone. I use a knife vs. the shears for this because it preserves the skin. Poultry shears will make a less pretty cut and tear at the breast. Once the breasts are sliced down to the bone, use your muscles and cut all the way through (see photo 4, below). Salt and pepper the breasts and set aside for cooking.
Here are step-by-step photos:


Now let’s make some tasty marinade…

Shallots, Blue Moon, S&P, lemon, orange marmalade and Dijon mustard are the simple ingredients in our marinade. Not pictured: garlic. He missed photo day due to a vampire-related incident
Orange & Blue Moon Marinade
1 tbs olive oil
1/2 c shallot, minced
1 tsp garlic
10 oz beer (get beer, take two sips, use rest)
1 1/2 c orange marmalade
1 tbs dijon mustard
1 tbs white wine vinegar
Juice of 1/2 lemon
S&P to taste
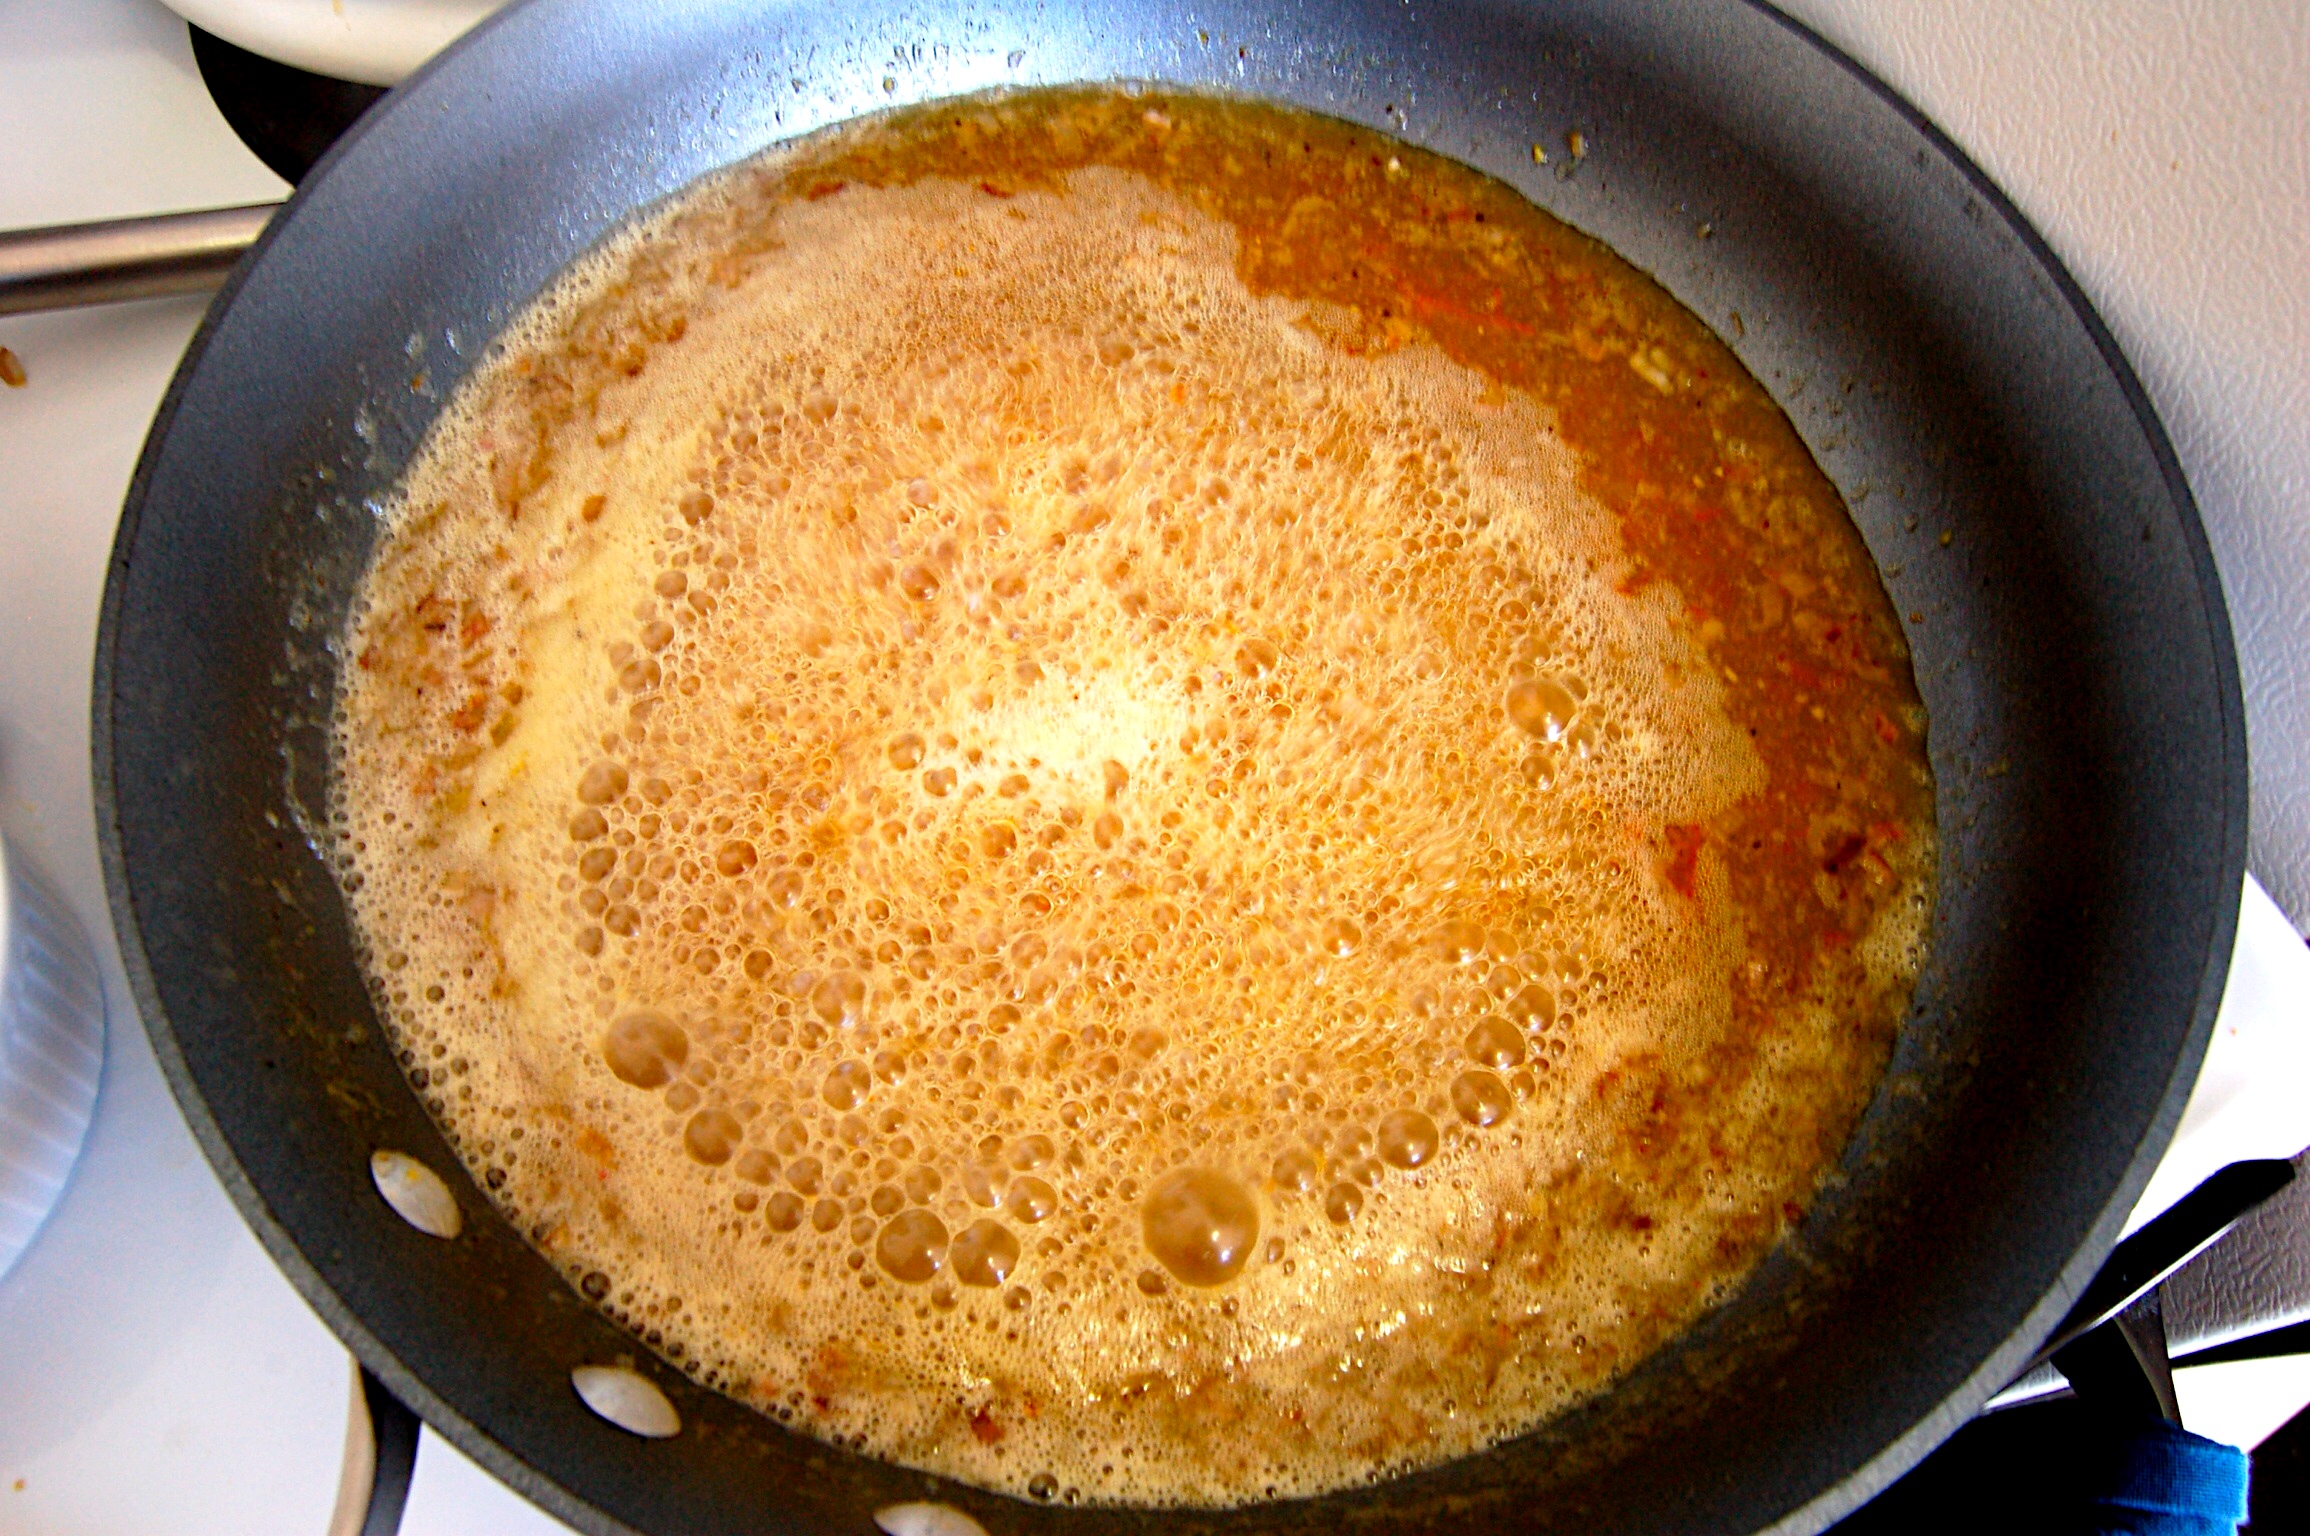
In a large non-stick pan over medium high heat, warm olive oil. Add shallots and saute until slightly browned. Add garlic and stir in pan for 1 minute. Add beer, which should bubble up and boil like the below photos. Turn down heat immediately and let reduce until the beer is about 3/4 cup.

 Whisk in remaining ingredients, add S&P to taste, and bring them to boil over a medium heat. Reduce to simmer until thickened. Let cool in the fridge for about 10 minutes (so the hot marinade doesn’t pre cook the hens). Once cooled, split the hens and marinade between two large freezer bags and refrigerate for 8-12 hours.

Ready for marinating time!
Searing, Roasting, Glazing & Finishing the Hens
Set oven to 350 degrees. In an oven-safe, large stainless steel or cast iron pan (I had to use two for all the hens), heat olive oil and butter over medium high heat. Add about 1/2 cup of the marinate to the pan. Sear both sides of hens until dark brown (the sugar from the marmalade will “burn” onto the chicken). If you’re doing all 4 hens, this will need to be done in batches. Once seared, add all remaining marinade to the pan. Note: you can only add back this marinade because you are going to FULLY cook this in the oven. Do not preserve marinade from the freezer bag as this has, duh, raw chicken in it! Place entire pan into oven and baste every 10 minutes (this is the glazing part!). Total roasting time in the oven is approximately 25-30 minutes or until breast of chicken is no longer pink.
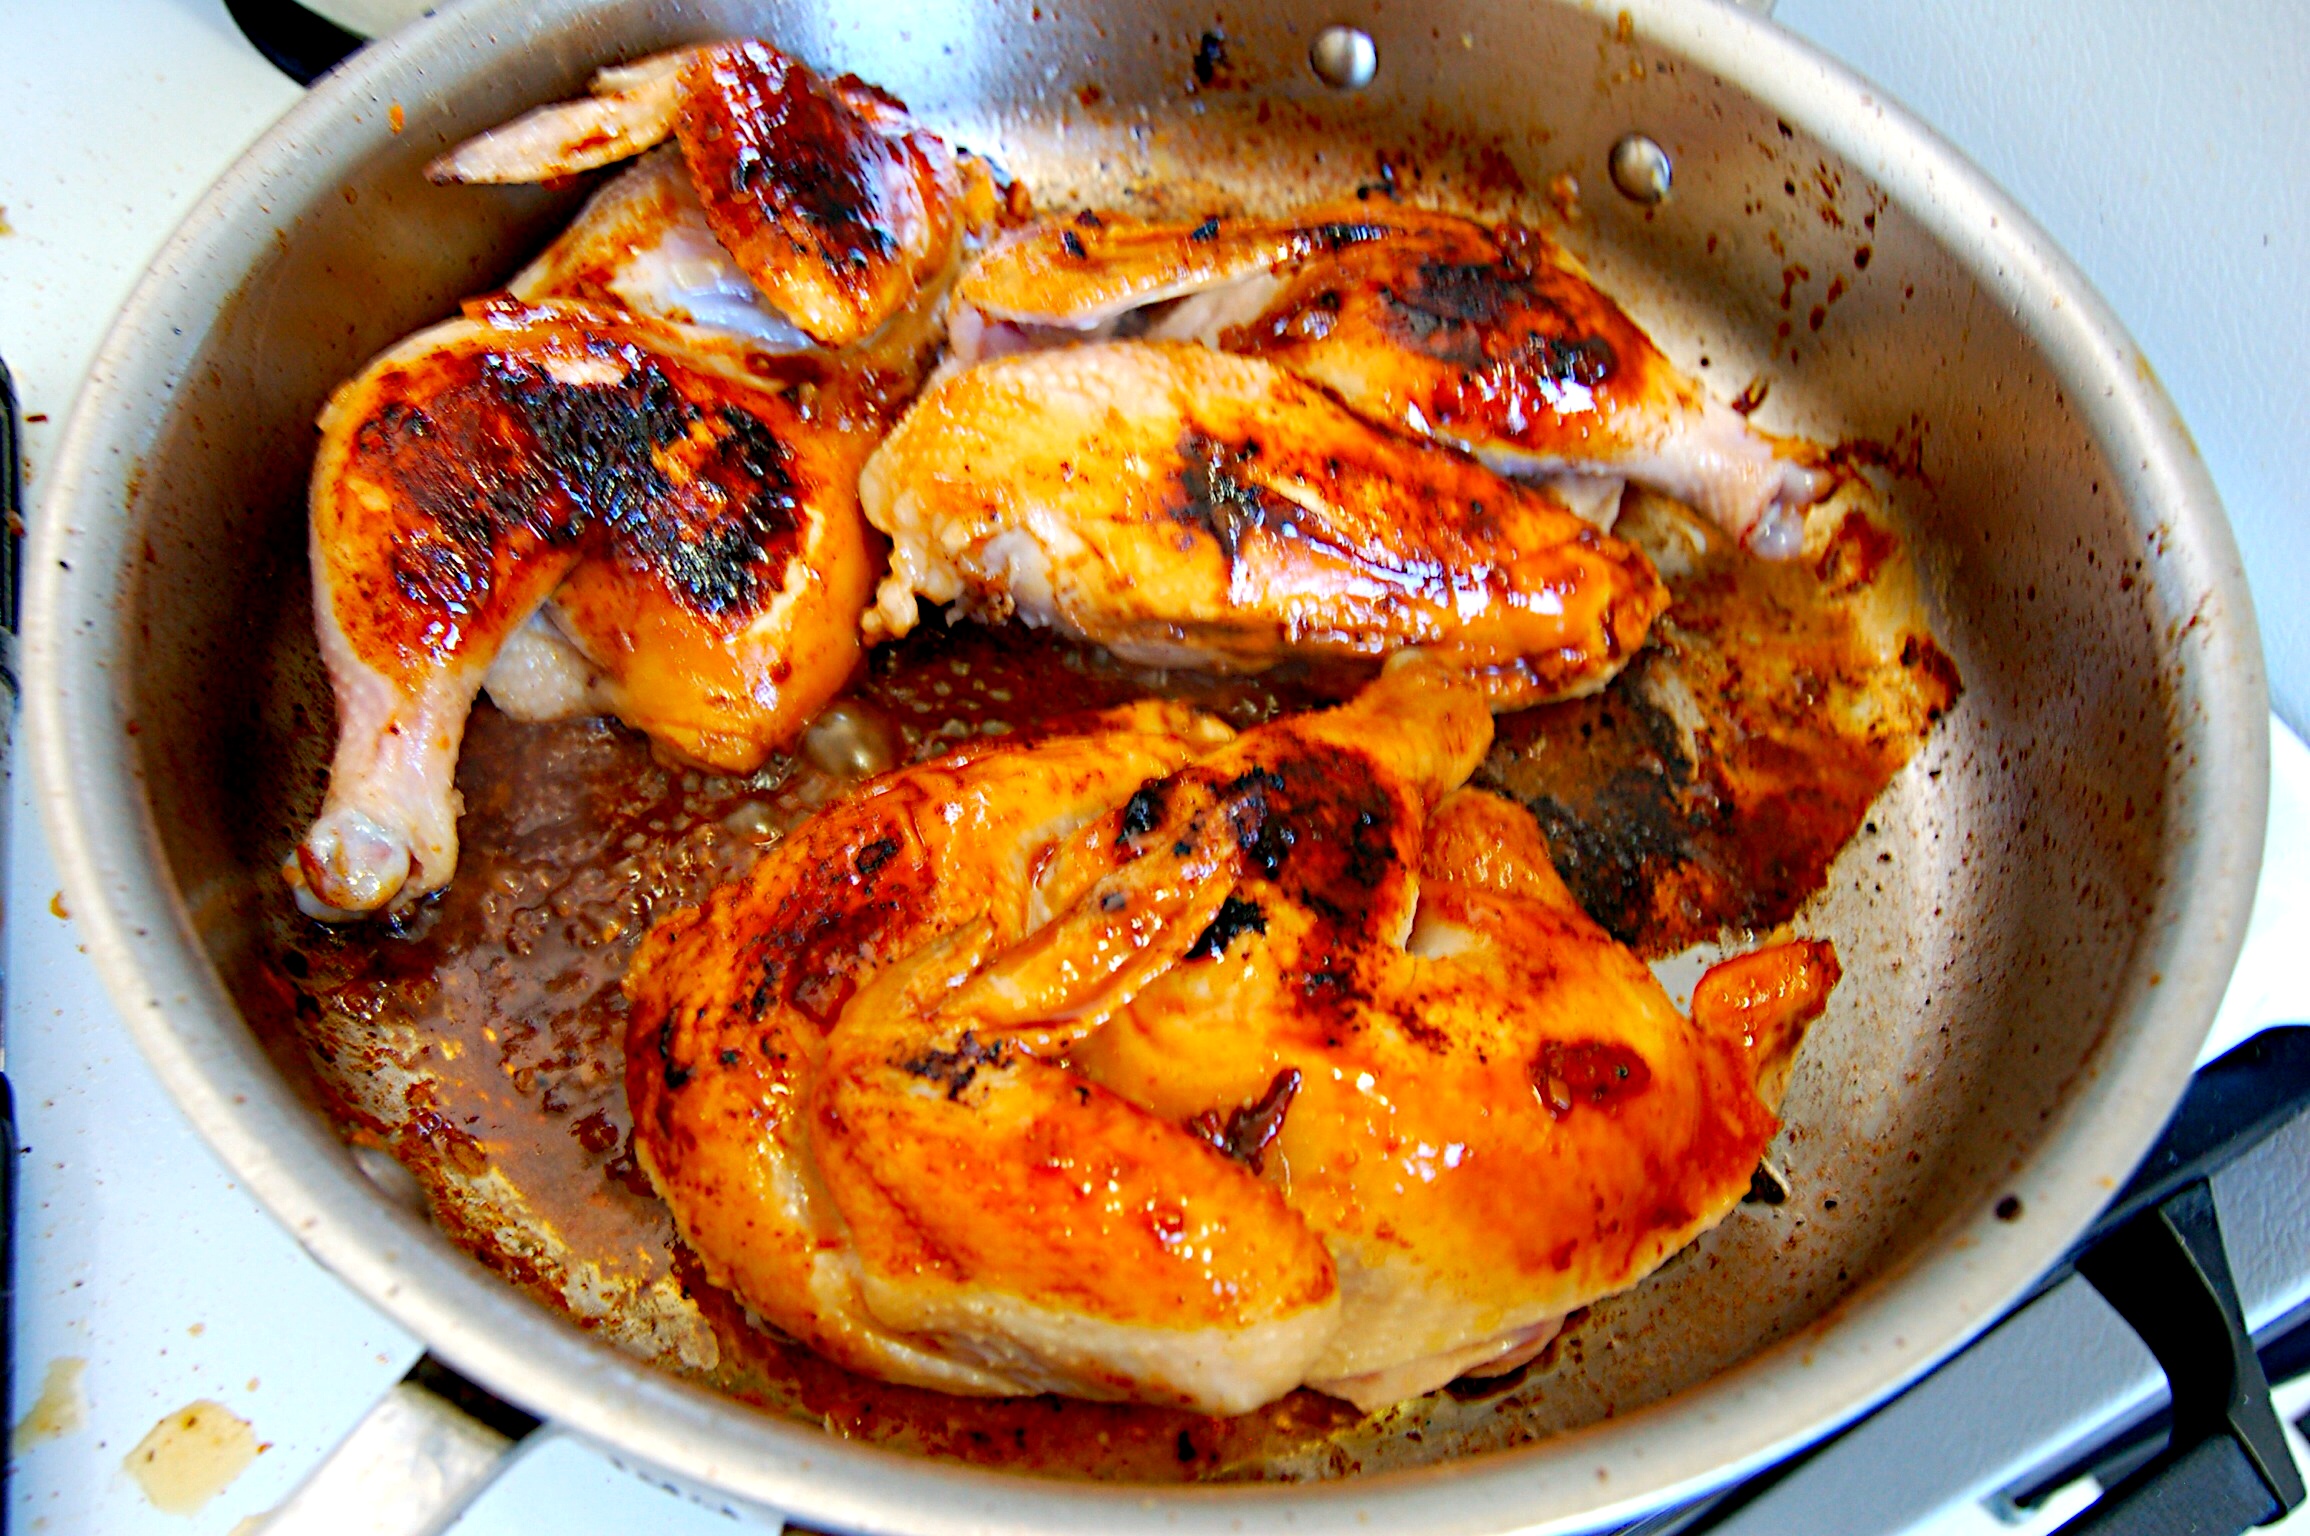
The sugars from the marmalade will “burn” on the chicken and turn it a beautiful deep golden brown

Seared chicken, ready for the oven
Once roasted, the marinade should turn a thick and be a beautiful carmel brown color. Let hens rest for 5 minutes (they’ve been through a lot!) and finish with chopped parsley, a bit of gravy, and, of course, another Blue Moon. Enjoy!