Work from home chicken wrap

Happy Covid-19 Shelter in Place day 14 from San Francisco, CA! Many of us are slowly adjusting to the new world of working at home; video conference calls, shopping at Safeway at 6am to find chicken, washing your hands 45 times a day, and juggling work with home-schooling little ones. In these times, shopping and cooking adds more stress to our already anxiety-filled days. Finding easy and fun things to brighten your day is essential for keeping your spirits up. 

To help in any way that I can, I created an easy, healthy lunch that is easy to put together and can be made in bulk for the week. This recipe combines my mom’s chicken recipe with my own twist. My mom is the author of Life as it Should Be, and she focuses her life on ways to simplify your life in order to free up time to do what’s really important to you.

I’ve also included alternative ingredients below for those of us who are missing ingredients at your local grocery stores.

During these times, I wish you all the most heartfelt “be well”, which also includes wellness in your spiritual and emotional world. Take care of yourselves and let’s get cooking!

Yummy chicken, greens, vinaigrette, pine nuts and gluten free spinach wrap

Ingredients:

4 chicken breasts

Olive oil

Bay seasoning

1/2 small shallot, minced*

2 cloves garlic, minced*

Juice of 1/2 lemon

2 tbs parsley (optional)

1 tsp vinegar

1 handful greens (spinach or mixed greens)

1/4 avocado, sliced

Sprinkling of pine nuts

Gluten-free spinach wrap (or any wrap you can get your hands on)

*For mincing, I cheat here and use this mincer from Sur La Table

Directions

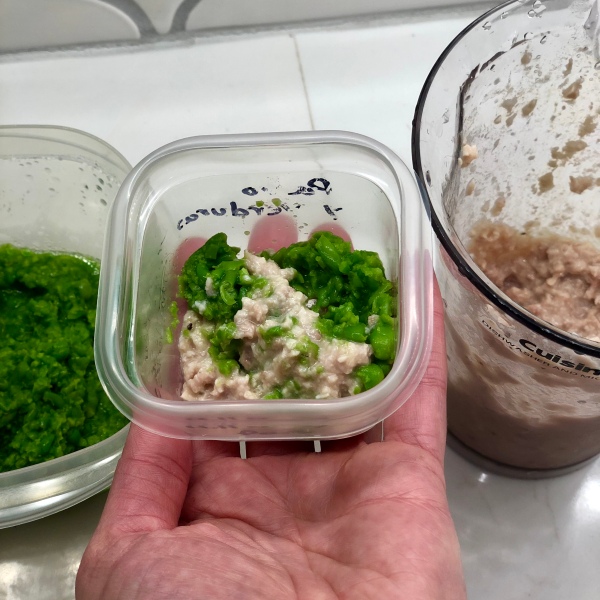
Make chicken: note- this chicken makes 8 servings for this wrap. I make the chicken in bulk as it can be used for many meals, including tacos, salads, spaghetti, etc. Preheat oven to 400 degrees. Wash and pat chicken dry and cover with about 2tbs of olive oil. Sprinkle generously with Old Bay Seasoning (you’ll want the chicken almost completely covered). Bake chicken for 10 minutes, then flip and bake 15 minutes or until juices run clear.

Make vinaigrette: In a small bowl, add juice of lemon, garlic, shallot, parsley, vinegar. While whisking, slowly add in about 1/2c olive oil. Season with salt & pepper. Taste vinaigrette and adjust as needed. Too sour? Add olive oil. No taste? Add salt. Tastes like olive oil? Add in vinegar or more lemon.

Alternate ingredients for a richer vinaigrette: sub vinegar for 2 tsp ground mustard or 1 egg yolk

Assembly: Toss spinach, avocado, shredded chicken, vinaigrette and pine nuts. Toast wrap or heat in the oven gently. You want it warm, but not crispy. I usually watch mine and make sure to grab it out as brown spots start appearing. DO NOT microwave. This will result in a soggy wrap that will fall apart immediately. Wrap up your delicious lunch and enjoy!

Other options where ingredients are not available:

No chicken? I used canned chicken for a bit and heated it in the microwave. Believe it or not, I found it at Walgreen’s

No tortillas? Make it a salad with quinoa or Cous-Cous

No greens? Add thinly sliced zucchini, or find a pre-mixed salad, using their vinaigrette. I used a Caesar salad kit for mine when my spinach was out and it was delicious 

None of the ingredients available? Shop at Safeway on Sunday RIGHT as it opens (6am for us) or just give in and have Cup Noodles until you can get what you need. 🙂

In closing, may you be well during these times. Be good to yourselves, be good to others, stay safe. And as we’re saying more than we ever have: We’re all in this together.

Yummy vinaigrette that can be used for lots of meals!
No wrap! No problem! Eat it as a salad and add quinoa or cous-cous

Baby Food!

img_4877

It’s baby food time! I’ve been slaving over making food, remaking food, spoiling food, wasting food, and defrosting/re-freezing food until my husband asked me if I was spending too much time on food. Which is his polite way of saying I’m spending too much time on food. Since I’ve learned a bit from my own mistakes, I thought I’d share what I know so far and the foods I’ve been making.

Let me just lay out a big disclaimer: I am not a doctor. I am not your doctor. I don’t have your baby, I only have my baby. Before you commence with baby food, please check with your doctor and do your own research.

Now let’s go make baby food!

Baby food makers: I researched quite a few, perhaps all since there aren’t that many. Lord knows I love a new kitchen toy, but I couldn’t justify a baby food maker. Most of them either blended (like my immersion blender), or steamed (like a steamer on a stove) or did steaming + blending (like I myself can do). Also, none of them have a one-touch button to steam and blend. The best ones require you to steam, then take it a part and add a new piece, then blend, and then clean all the parts. Sounds a whole lot like using a pot and a blender and cleaning those up. Hence, no new toy.

Meals made same as family meals: By far, the easiest way to make baby food is to feed him whatever you’re cooking and eating. I just make his with less butter and salt and blend it up for a delicious meal. If you like it – your baby will like it. For a finger food option, I break off small pieces, mush them up a bit, and give them to my son. His favorite is pizza (so bad, but so good!).

Baby led vs Spoon fed: Again, I’m not your doctor, so please check with them and do your own research. I found that babies are going to do whatever they are going to do. You can work with them to train them into one kind of feeding or the other, but eventually they’ll do both. My favorite article on starting solids is on Lucie’s List, which is a great overall resource for guidance and product reviews. My son started with spoon-fed baby cereal (available at most grocery stores in the baby isle) mixed with formula and then avocado by me finger feeding. And don’t worry if they hate it for the first time (or 10 times) that your baby tries the food. In fact, I’m pretty sure that the only reason my son ate the avocado is because he accidentally inhaled it and then decided he liked the taste.

Single servings for blended food & storage: another disclaimer – this is just what I follow based on my experience, so please do your own research and make your decisions accordingly.

    • Have beef or chicken broth on hand in the freezer as all meats need a liquid to blend well. My son doesn’t like non-blended meat because it tickles his throat and he’ll immediately cough it up
    • Steam if needed to soften food
    • Blend using whatever blender you have on hand. I use my immersion blender.
    • Make 2-3 cups of each kind of food at a time
    • Make multiple kinds of food at a time as this is a time saver and you can mix items together for a full meal (yams & chicken are my son’s favorite!)
    • In small containers, spoon in a 1-2 serving size meal. Small servings are easier to defrost and you can take them to go as needed
    • Put one of the small containers in the fridge, the rest in the freezer
    • For the remaining food, store in a larger container in the freezer
    • Most food stays about three days in the fridge and three months in the freezer. But your kiddo will probably eat it fast enough that you don’t have to worry about storage time
img_4259-1
Choose a variety of foods to introduce your baby to all different flavors

img_4271

Have all your tools ready to go!

img_4272

Gently steam veggies before blending. I use a steamer on the stove

img_4263

Peas – always a baby favorite!

img_4273

Single serving size makes it easier to defrost and take your baby food to go

Here is a list of items I’ve made and notes I have on each. I’ve organized these by spoon fed and finger food options, but they are interchangeable. Spoon fed can be cut into small, thin chunks instead of blending, and finger food can be blended. Babies should be eating a mixture of foods from all categories for a well-balanced meal

Spoon fed options

  • Yogurt: Use full-fat yogurt with very little sugar. Many grocery stores even have baby yogurt, which is great since it already is full-fat with low sugar and the servings are very small (won’t spoil as quickly as a large container). Plain, Greek yogurt mixed with blended fruit is a great option, but make sure to get a small size unless you’re also going to eat it yourself
  • Yams, carrots, apples, squash, pears: Chop, steam for about 10-15 minutes, then blend. These can be mixed with lots of different proteins and spices such as cinnamon
  • Corn, green beans, squash, peas: No chopping needed, just steam until fork-soft then blend
  • Stone fruit: Steam for 15 minutes, then chop small or blend. Note that some of these fruits will just dissolve when you try to chop or blend them, like nectarines, but these are still a great flavor add to cottage cheese or ricotta
  • Berries: Steam gently first, but only for a minute or two. Berries will quickly get too soft and dissolve into the steamer. Blend, but just a little bit otherwise you have jam on your hands. Which isn’t terrible either, but may not be your intention
  • Eggs: Either hard boiled or scrambled. No blender necessary as these are easily smashed by a fork
  • Smashed avocado & banana: Smash and feed!
  • Ricotta: Mix with blended fruits and also enjoy it as dessert yourself
  • Melons: No steaming needed, just blend. However, these pulverize into juice quickly. I end up just spoon-feeding him this “juice” for a morning smoothie
  • Cottage cheese: use full-fat. Can be mixed with berries
  • Spices and herbs: Mix these into foods to expose your baby to lots of different flavors
  • Mushrooms, quinoa and leafy greens: Steam gently then blend. Great additions to proteins, but I’ve never been able to convince my son to eat them by themselves. Have you tried blended mushrooms? YUCK

Finger food options:

  • Cheerios: Baby favorite!
  • Mum-Mums: Available in most grocery stores, Mum-Mums look like long crackers, are soft for baby digestion and are easy to hold. These were the first items that my son would self-feed and they’re great for grab-and-go
  • Avocado & berries: Good for baby’s dexterity because it’s slippery! It is very important that these are cut down to bite-sized pieces ESPECIALLY the banana, as its one of the highest for choking hazards given it’s cylindrical shape
  • Cheese: Cut into small, skinny slices. Mild flavors that are not soft (like brie) are a good start. Think cheddar, Swiss, Colby
  • Scrambled eggs: Break into small pieces first
  • Spaghetti: Limit sauce to reduce mess and cut noodles into 1-2 inch lengths
  • Ravioli: Buy small ravioli, overcook it, cool, and cut into 4ths
  • Spiral Noodles: Cut in small pieces and mix with protein, herbs, and a little sauce
  • Citrus fruits, watermelon, raspberries: Cut up in bite-size pieces. Note that the fruit has to be soft, otherwise your baby will likely scarf it down whole.
  • Anything you’re eating!

Hopefully these ideas will get your brains a’churnin and, at least encourage you that baby food making can be fun, creative, easy, and more than just squash and peas!